Planner Calendar
When you click the Planner tab of the Header Menu, you can go to one of three calendar views. You can switch between views on the calendar page. By default, you initially see the Month View, but you can change this to the Week View or Day View by selecting the appropriate radio button under the Personal Settings tab of the My Account page. You will also see the Month View if you click the “View larger calendar” link in the calendar on the Lectionary Banner; the view you see when clicking this link cannot be changed.
The particular day or days you see when arriving at the calendar are determined by the lectionary day on the Lectionary Banner (the banner doesn’t appear on the calendar page). These can be changed by using the controls at the top of the calendar; these controls change, depending on the calendar view.
Month View
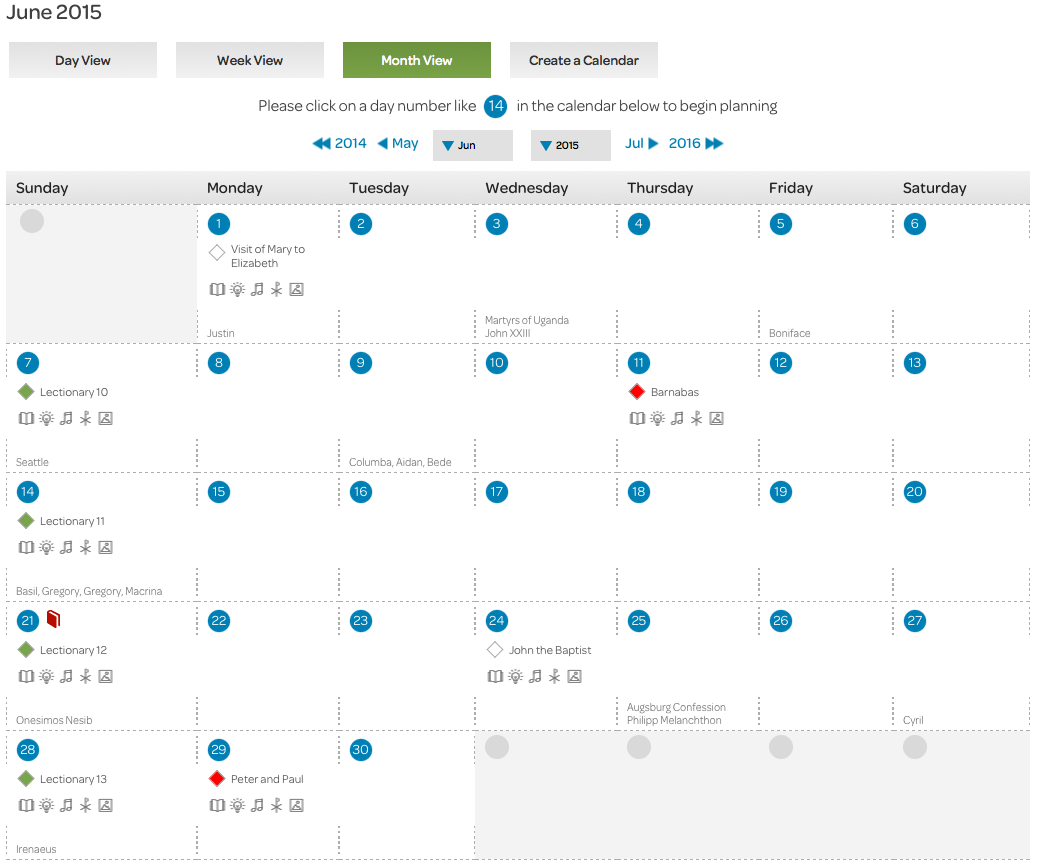
To change the calender to one month earlier or later, or one year earlier or later, use the controls on the left and right. To jump backward or forward several months and/or years, use the drop down menus in the center.
![]()
Each lectionary event in the month is identified by an abbreviated form of its name. Its liturgical color is also provided. Commemorations are noted at the bottom of a date’s cell where necessary. If you have one or more saved plans for a given date, a red book icon appears next to that date’s number (see June 21 above).
![]()
The icons under each lectionary day name link to content relevant to that day. Hovering over an icon produces a tool tip that indicates where the icon leads: the book opens Day Texts, the light bulb opens Day Resources, the musical notes open Music material, the Chi-Rho reveals Preaching resources, and the framed picture goes to Visuals content.
To access the Preaching content, a Deluxe subscription and an add-on Preaching subscription are required.
Clicking a blue date circle takes you to the Day View of the calendar for that date, from which you can begin building a new worship plan or editing an existing one.
Week View
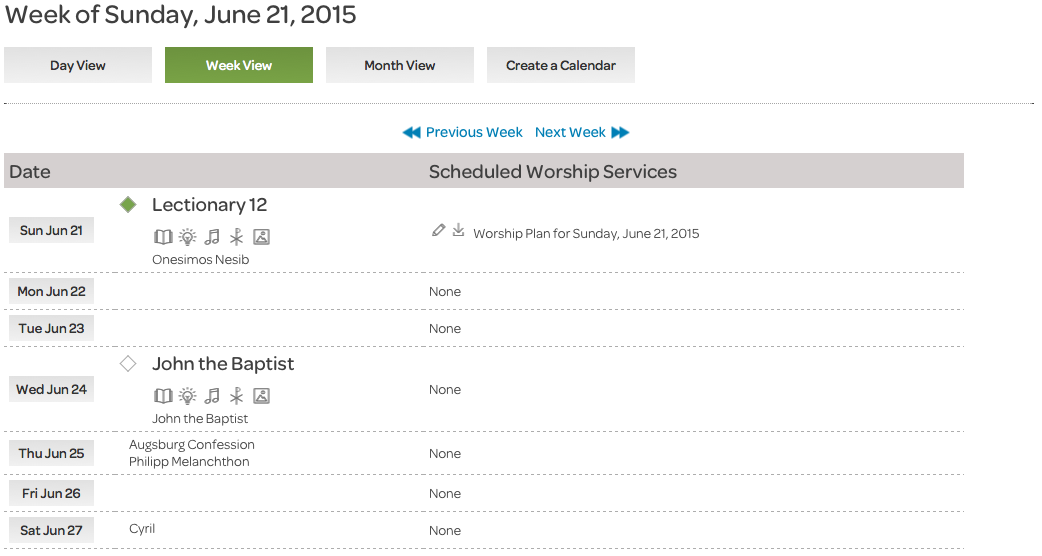
The Week View shows the seven days starting with the Sunday on or before the date in the Lectionary Banner, or the date picked in one of the other calendar views. As with the Month View, lectionary days are identified with abbreviated names, commemorations are noted, and a row of icons under a day name can be used to access content specifically for that day—see Month View, above, for details.
Clicking a date in the left column takes you to the Day View of the calendar for that date, from which you can begin building a new worship plan or editing an existing one.
Existing worship plans appear in the right column, next to a pair of icons. The pencil icon opens the plan for editing, while the inbox icon downloads the plan to your desktop.
Day View
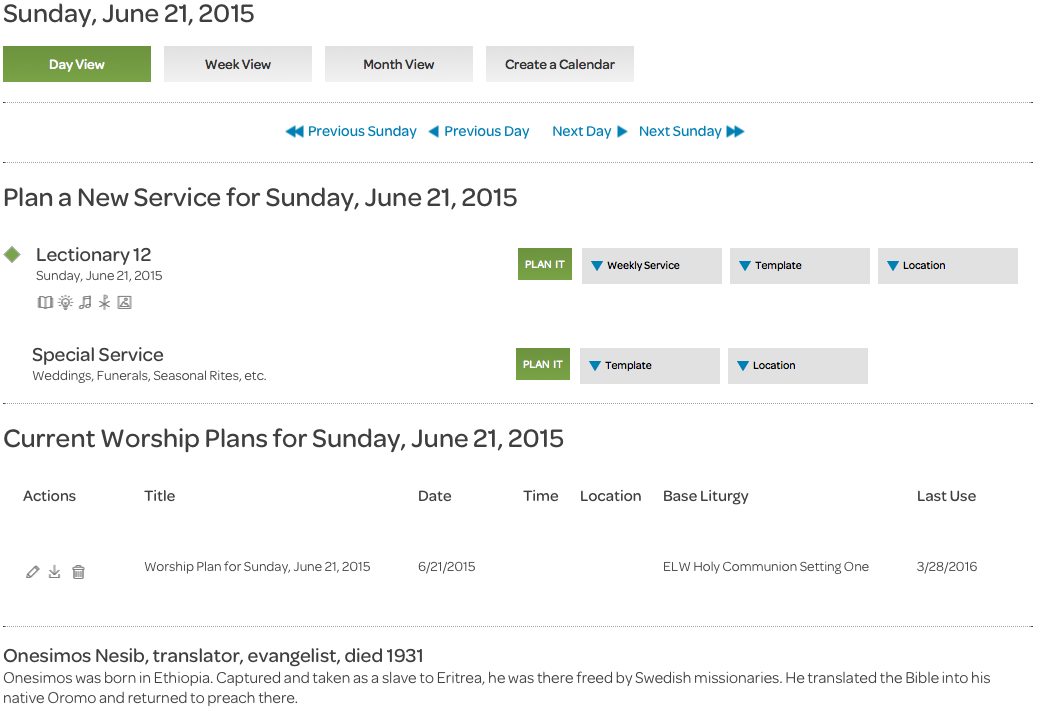
From the Day View, you can begin to plan a new service by choosing a basic service type.
You can begin editing an existing plan by clicking the pencil icon next to the plan title in the central section of the view, download it to your desktop with the inbox icon, or delete it with the trashcan icon.
If one or more commemorations occur on the date, their names and descriptions appear in the bottom section of the view.
Create a Calendar
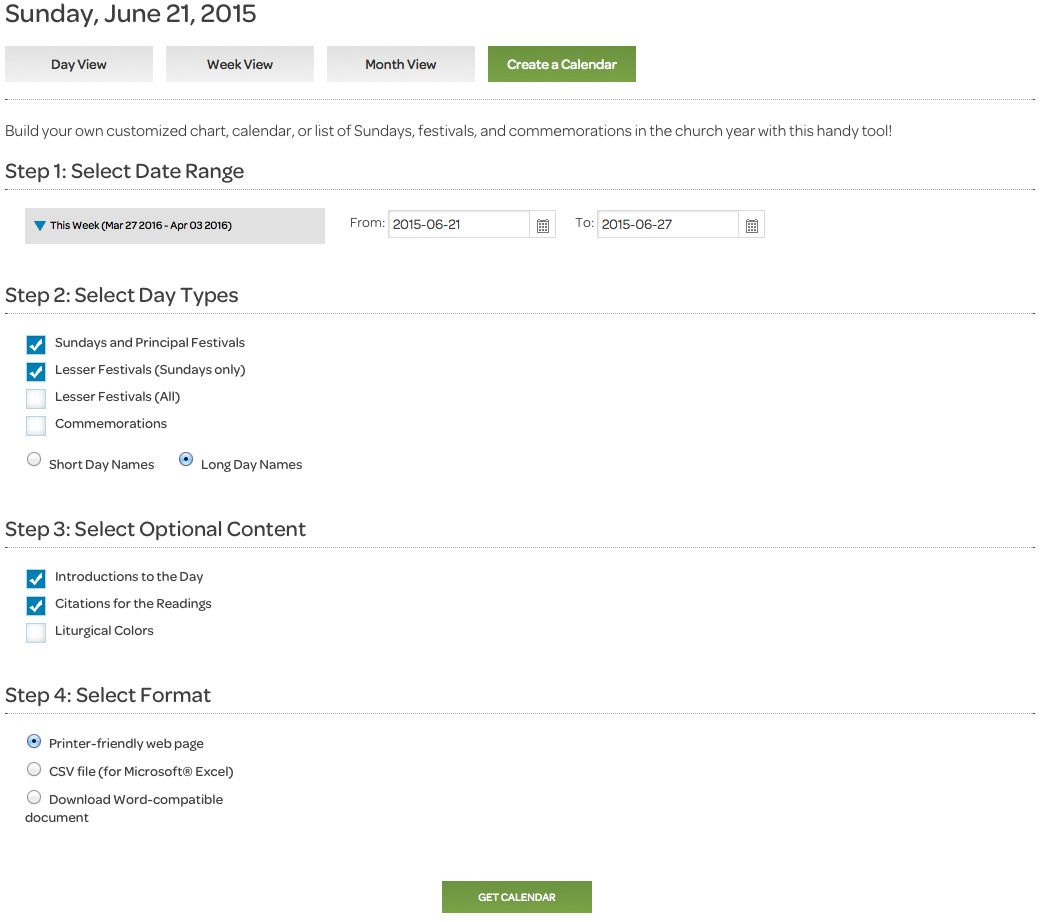
The fourth tab on the calendar page, Create a Calendar, allows you to download information about lectionary days that fall within a particular range of dates. You can pick from a pre-determined list of date ranges in the Step 1 drop down menu, or set the range yourself using the “From:” and “To:” date fields. From there, select the day types you’re interested in, the information you’d like, and the kind of file you’d like to download. Finally, click the “Get Calendar” button.
A Note on Citations and CSV Files: If you include the reading citations in your calendar and download it as a CSV file, you might see the citation for just the first reading when you open the file. All of the citations really are there; the rows in the CSV file just aren’t expanded to their full height. To expand the rows, highlight the whole file, hover over the bottom of one of the rows in the column on the far left where the row numbers are (the cursor will change to a horizontal line that’s cut in half by a vertical line with arrowheads on each end), and double-click. You might also find the download easier to work with if you convert it to an Excel spreadsheet (XLS or XLSX), using Excel’s Save As command.